In my last article, I set up serial file transfer between an ancient 386 desktop (running Windows 3.1) and a modern laptop running Xubuntu 18. Part I is available here.
Once my 386 was accepting files from a host laptop I was ready to move forward with my goal of accessing the web.
After installing the correct software packages (thanks, Internet Archive) I ran some network-based experiments on the machine. I ultimately met my goal of connecting to a public-facing server (HTTP and Telnet) while also learning a lot in the process. This was my first deep dive into the world of retro computing, and I had lots of fun!
Below I will documents how I connected my 386 to a network.
Experiment I: Telnet/TCP
When I started the project, I assumed that TCP network setup on older machines would be a challenge. To try things out quickly, I decided to pursue a less ambitious goal of piping a single TCP socket over a serial line. This would essentially turn my machine into a terminal emulator and avoid the issue of Windows 3.x networking altogether.

My setup was simple: on one end of a serial-to-USB cable, I had a modern Linux laptop. My 386 machine would sit on the other end of the cable and use the modern laptop as a proxy (mostly to avoid native TCP setup in Windows 3.x).
To facilitate data transfer between the two machines, I used the popular TCPSer application, which acts as a bridge between a TCP socket (Telnet) and a serial port.
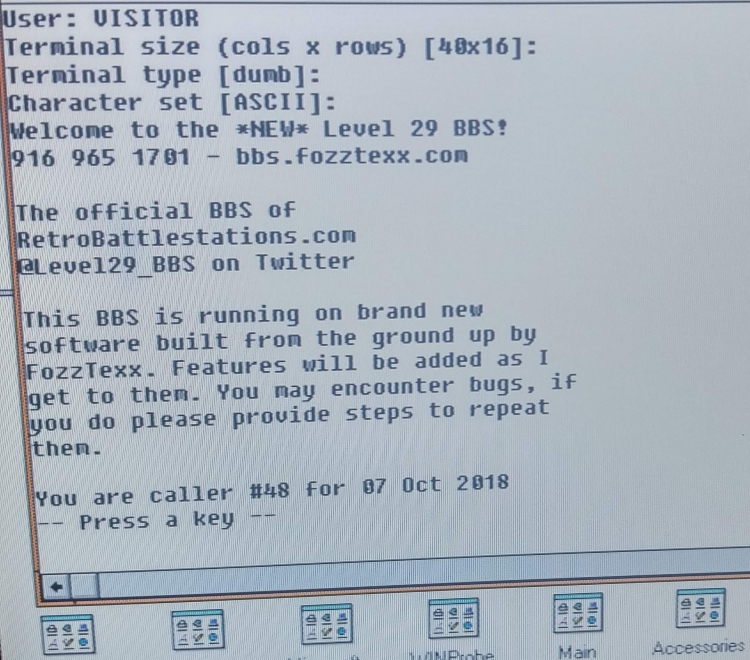
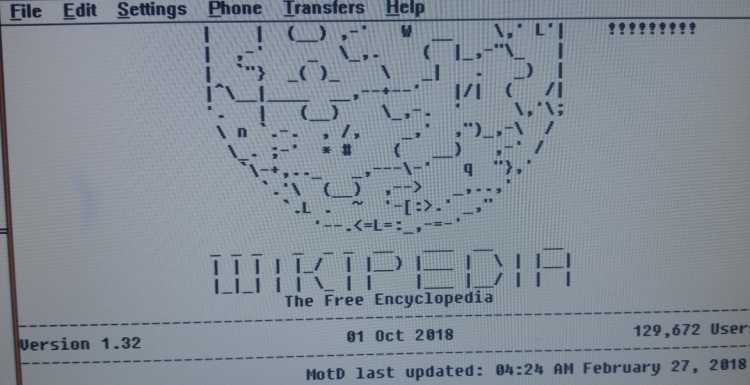
The process was even simpler than I had anticipated. In the course of one afternoon, I was able to access several BBS systems and even the Telnet edition of Wikipedia. A thriving community of retro enthusiasts keep the BBS tradition alive and well, even in 2019.
I won't say too much more about the setup process, since there are plenty of good tutorials that already cover this topic.
Experiment II: A Serial-to-WiFi Adapter
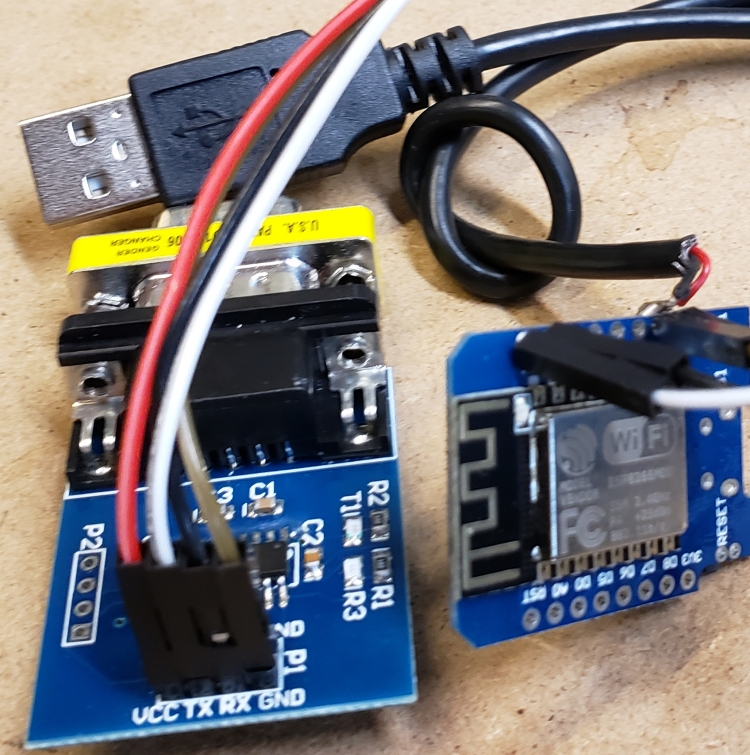
Another experiment I tried was connecting the serial port of my 386 to an ESP-8266 microcontroller. This is essentially the same result as using TCPSer, but with a compact microcontroller instead of a full Linux desktop.
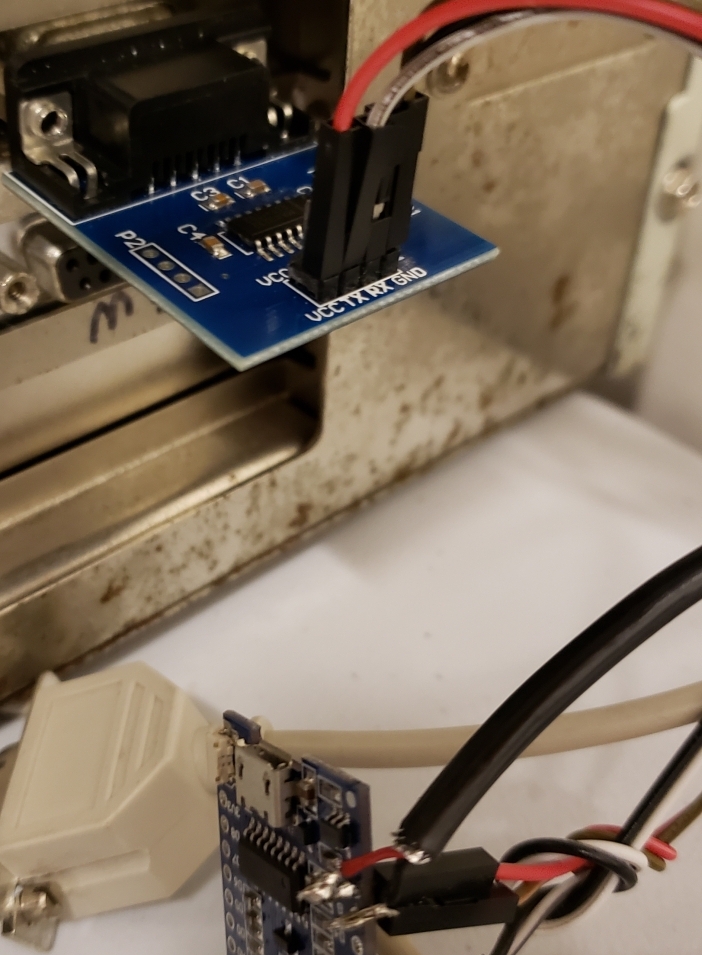
The factory default ESP firmware has a number of Hayes compatible AT commands that allow users to open arbitrary TCP sockets and then read them over a TTL pin. By soldering a MAX-3232 board to an ESP, I was able to convert TTL signals to RS-232 and plug the ESP directly into the 386's serial port, thereby eliminating the need for the host laptop mentioned in experiment I.
The module quickly connected to my home WiFi and I was able to use the default ESP commands to open connections. I thought this process would be more involved, but it really was as simple as soldering a MAX-3232 to an ESP.
Fun fact: I am fairly certain that the modem has better specs in terms of CPU, storage and memory than the desktop it is connected to.
Experiment III: A Full TCP Stack
After connecting to BBSes and Telnet services over two different channels, I was
ready for a more challenging task. My goal was to get a full-blown TCP stack
running on Windows 3.1 so that I could do more than just BBSing. To do this, I
made various attempts to trick
my 386 into thinking the modern laptop on the
other end of the serial cable was a modem.
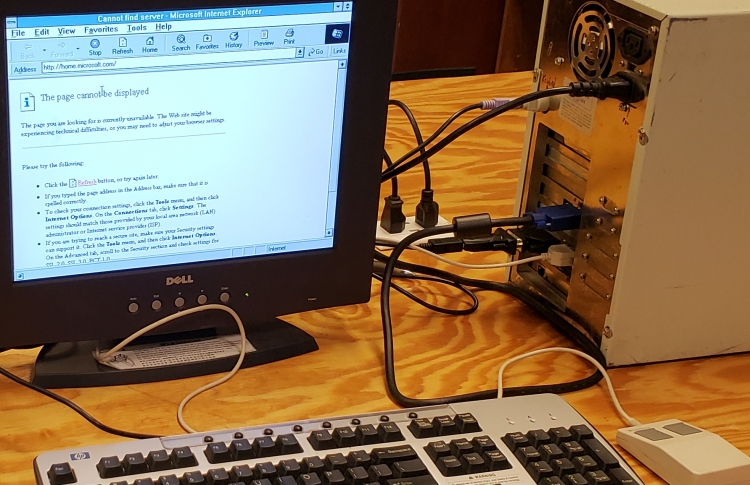
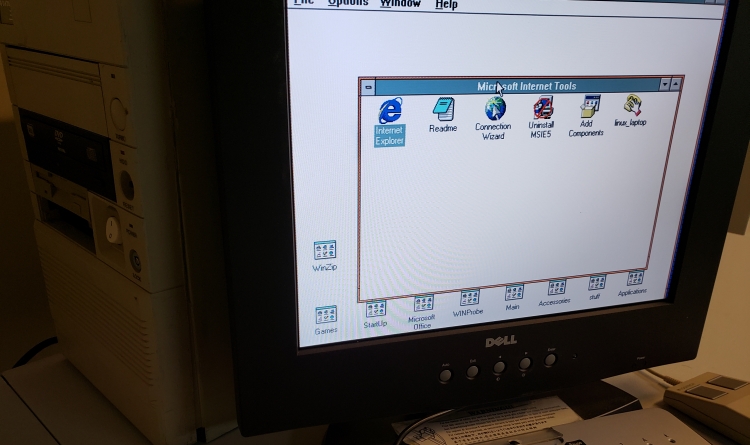
I found an interesting article within the Sega Dreamcast community and even tinkered with the idea of writing a custom script that could emulate a modem and dialup ISP. This turned out to be as difficult as anticipated. Due to a meager 4 megabyte memory limit, many of the browsers of the era would simply not load on the machine, citing a lack of memory. After failed attempts to load Netscape and Opera, I was ultimately able to install Internet Explorer 5. This came as a surprise to me, given the history of the three browsers.
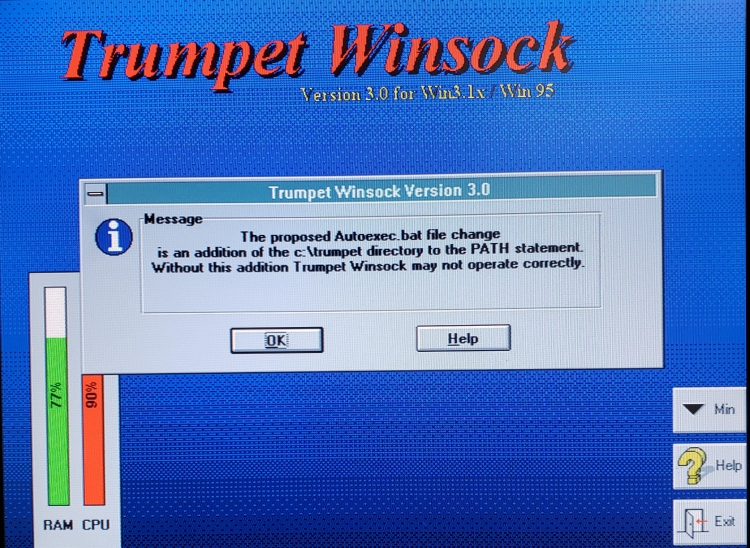
After consulting with the Internet, I installed Trumpet Winsock on the target and began the configuration process on the host machine (a modern laptop running Xubuntu 18). Trumpet Winsock is a popular software package that is used on Windows 3.1/Windows 95 machines.
Configuring the Host: SLIP and Serial
As mentioned in part I, the physical layer between the two machines was a USB-to-serial adapter. Nothing new there.
For the data link layer, I chose SLIP, because I did not have the patience to deal with the more advanced PPP protocol. Although not as elegant as PPP, it proved to be easier to manage and was well supported by Trumpet.
To create a link between the two machines, I used
slattach on the Linux side of the link.
slattach is a tool that puts a standard serial line into network mode
(SLIP,
in my case):
slattach -s 19200 -p slip -d /dev/ttyUSB0
The flags were as follows:
| Flag | Meaning |
|---|---|
-s 19200 |
Speed / baud rate (my machine could not handle data faster than 19200 baud) |
-p slip |
Sets the line protocol to slip, as opposed to cslip or ppp. |
-d |
Enable debug output. |
With my serial line configured for SLIP, I was ready to move up the network stack and begin IP configuration.
Configuring the Host: IP Tables
Once slattach is called, you can verify connectivity by running
ifconfig sl0:
sl0: flags=4240<POINTOPOINT,NOARP,MULTICAST>  mtu 296
        slip  txqueuelen 10  (Serial Line IP)
        RX packets 0  bytes 0 (0.0 B)
        RX errors 0  dropped 0  overruns 0  frame 0
        TX packets 0  bytes 0 (0.0 B)
        TX errors 0  dropped 0 overruns 0  carrier 0  collisions 0
slattach has created the appropriate network interface, but we still need to
configure the network interface and bring it up:
sudo ifconfig sl0 192.168.5.1 netmask 255.255.255.0 up
In my case, 192.168.5.1 was not in use. Your local network may differ.
To verify that everything worked, I ran ifconfig sl0 again:
sl0: flags=4305<UP,POINTOPOINT,RUNNING,NOARP,MULTICAST>  mtu 296
        inet 192.168.5.1  netmask 255.255.255.0  destination 192.168.5.1
        slip  txqueuelen 10  (Serial Line IP)
        RX packets 0  bytes 0 (0.0 B)
        RX errors 0  dropped 0  overruns 0  frame 0
        TX packets 0  bytes 0 (0.0 B)
        TX errors 0  dropped 0 overruns 0  carrier 0  collisions 0
My Linux laptop could now transfer IP packets over the serial line.
Configuring Trumpet
Now that the host laptop has SLIP and network interfaces configured, I needed to setup Trumpet.
Trumpet is a popular shareware TCP stack for Windows in the mid 90s. Be advised that if you plan on using this software for more than thirty days, you must purchase a license from the author.
I used the following configuration values:
| Setting | Value |
|---|---|
| IP Address | I used 192.168.5.2, but your IP address availability may differ |
| Netmask | 255.255.255.0 |
| Nameserver | You can use 8.8.8.8 if you are unsure. I noticed increased latency compared to my ISPs nameserver. |
It is also important to ensure you are not using PPP.
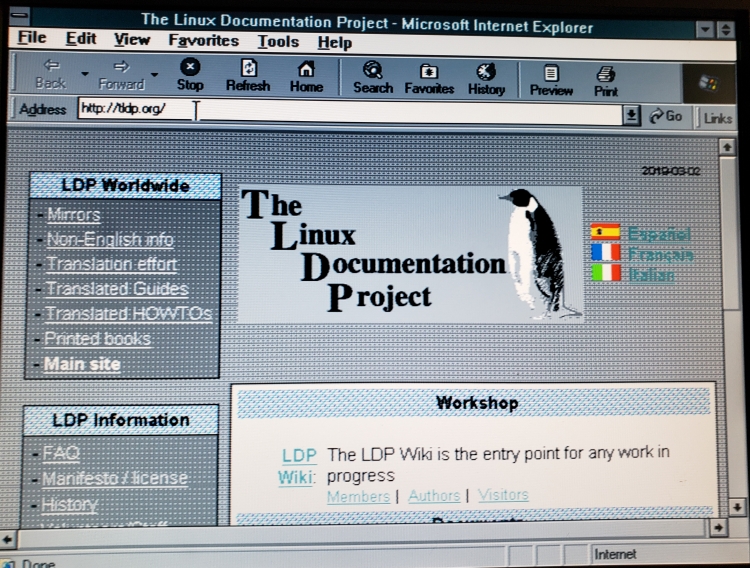
Once properly configured, you should be able to run ping on either end of the
network and get a response. Just for fun, I ran a small HTTP server to see if
IE5 would load it (it did):

At this point, I am able to send TCP packets between the two machines, but I do not have access to the internet. To contact the outside world, I need to set up network address translation, which is how the 386 packets will travel to the outside world with my laptop acting as an intermediary.
Configuring the Host (Again)
Before proceeding, be sure to enable kernel level IP forwarding on the host:
sudo bash -c "echo 1 > /proc/sys/net/ipv4/ip_forward"
You will need to run the command above on every boot.
After that, you will need to run iptables to route outbound traffic. In my
case, the outbound network interface was wlp1s0, but yours may be different
(especially if you use ethernet instead of WiFi).
You can determine your outbound network interface by running ifconfig.
# Change the value of `wlp1s0` to the correct interface!!
sudo iptables --table nat --append POSTROUTING --out-interface wlp1s0 -j MASQUERADE
sudo iptables --append FORWARD --in-interface sl0 -j ACCEPT
I could now surf the web!
What I Learned
Fun fact: Although the SLIP protocol does not have a formal IETF standard, it does have a formal nonstandard that is comprised of a few lines of C code.
Although I did not have time to meet my stretch goal of running a web server on
the target device, I did have fun revisiting the technology of my childhood. I
was able to refresh my memory on many topics that I don't see day-to-day (such
as SLIP, iptables, xmodem and layers 1 and 2 of the OSI model). I also saw
an exaggerated perspective of bloat on the modern web. Popular websites such as
Google were nearly unusable. Uncompressed images that load quickly on modern
devices could take up to 10 minutes to load on a constrained device.
On the flip side of the spectrum, there are still some websites out there (such as these) that performed surprisingly well. TLDP.org loaded quickly and rendered in a nearly identical fashion to the modern host machine.